Monday, November 28, 2011

I GOTTA get back in gear!

It has been FOREVER since I've posted! I did make Halloween cards but didn't get a single one posted. I also made Thanksgiving cards but, again, didn't get a single one posted. So, figured I might as well start with Christmas! This is one of the many Christmas cards I'll make this year. The "idea" for this card is not my own though. I got a "kit" from a couple of the other ladies in my group last year and a card very much like this one was in that kit. I could be wrong but I am pretty sure the card was designed by Gayla O'Dell. The only major difference between her card and mine is that we didn't have these cute stitched felt pretties last year. Here is a list of the items I used to make this card.

Stamp set: NONE? WHAT?

Cardstock/paper: Whisper White, Cherry Cobbler, Metallic Silver

Ink: Basic Gray

Other: circle hole punch (for doorknob), mini glue dots, Winter Wishes Stitched Felt, Real Red 1/8" Taffeta Ribbon

All products made by/sold by Stampin' Up!

Thursday, September 22, 2011

Alcohol Splash technique

GEEZ....again....it's been awhile! I can't seem to get my body to conform to my new schedule! I should have started working outside the home at least a few years back. Maybe then I'd be used to being gone and on my feet for about 8.5 hours a day! I'm just so tired by the time I get home that I can't bring myself to create. And, on the weekends I have other things around the house that I have to get done! I do so miss my create time. Anyway, I've found a new fascination with alcohol inks. I used them on the flowers on this card. The technique is called Alcohol Splash. All you need is a piece of glossy cardstock big enough for your images that you want to stamp, 2-3 colors of alcohol inks, black permanent ink (i.e. StazOn), a stamp with open areas and some scissors. Other than the alcohol inks I'm sure most stampers have everything they need. So, you squirt the first color of alcohol ink onto your glossy cardstock. Then, squirt some of the second color. If you are using only two ink colors, use this second color to fill in any white areas on your cardstock. If you are using a third color, you use that one to fill in any white areas. Lift your cardstock while the ink is still wet and tilt it and move it around so that the inks mix. You can repeat with any of the alcohol inks to get the color and mix you want. Then, after the ink is dry (you can use your heat tool to speed the drying) you stamp your image directly on top of the alcohol inks using the permanent ink. Let that dry or use your heat tool again to dry it and then use your scissors to cut out your stamped image. That's it! Use your cut out images on your card or whatever your project is! Here are the items I used to make this card.


Stamp sets: Flower Fest, Full of Life


Cardstock: Glossy White, Whisper White, Melon Mambo, Daffodil Delight


Ink: StazOn Jet Black, Melon Mambo


Other: alcohol inks, Big Shot, Finial Press embossing folder, XL Oval punch, XL Decorative Label punch, sponge, Daffodil Delight 1/8" Taffeta ribbon, Stampin' Dimensionals


All products made by/sold by Stampin' Up! (except for the alcohol inks)


Wednesday, August 3, 2011

Punched Through Ribbon technique

MAN....I didn't realize it had been so long since I'd posted here! SHAME on me! It's been a busy, busy time for me. First, I had cataract surgery. The left eye was done in mid-July. My right eye was done just a couple of days ago. My vision is WAY better already!


Alot of you know that I volunteer and help run a dog rescue here in Missouri called 7 Bells Sanctuary, Inc. Well, the founder passed away last year. The other volunteer and I have been able to carry on with the rescue. Well, the other volunteer passed away unexpectedly just a few weeks ago. She was our main foster home. Her husband and son are helping out with all the foster dogs at their house. As soon as we are able to find homes or other rescues to take those dogs we will be shutting down 7 Bells Sanctuary. It's so sad for me. Not only have I lost my two best friends over the last year or so but now 7 Bells Sanctuary will also be no more. It has been such a big part of my life for so long. I will really miss it. But, I also know I can't carry on without either one of them.


On top of those two things, I also got a job outside of my "stay at home" law office job and Stampin' Up! I am working at our local pharmacy as a pharmacy tech. NOT an easy job like you might think it would be! I am not picking up the computer part of the job as I had hoped I would. It's been tough and my old bones aren't handling it well. Working a full time job (my law office job) and a part time job (at the drug store) and still have time for my dogs, cleaning house and playing with my Stampin' Up! stuff is more than my body can take most days! I feel every one of my 48 years most days now!
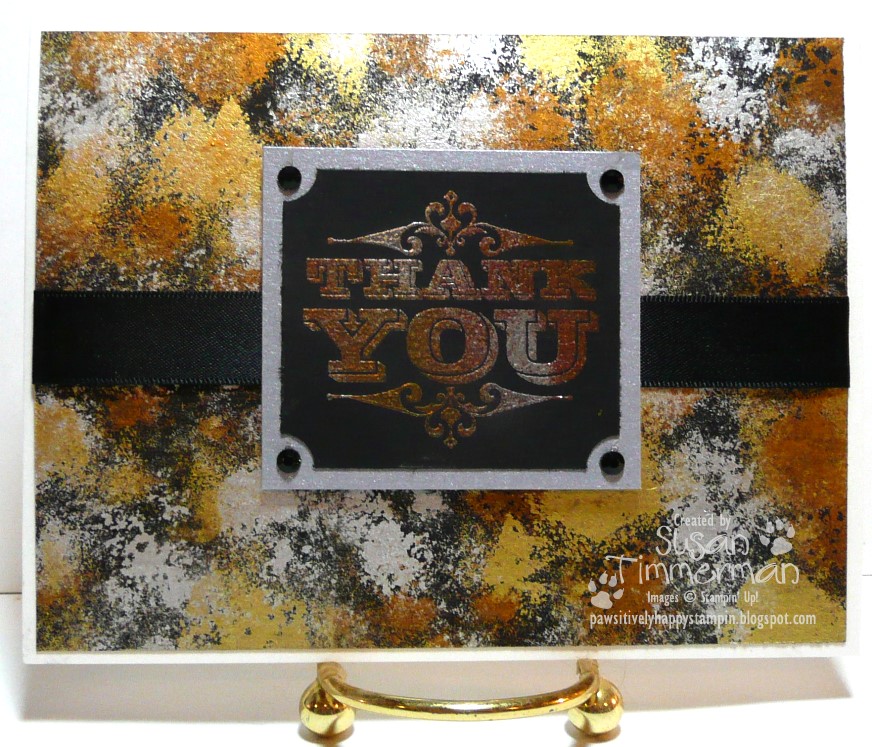
OK...enough grumbling from me! I'll get on to telling you about my card.

The technique is called Punched Through Ribbon. Basically, you punch a shape into the front cover of your card and then use scraps of ribbon to fill in the shape. As you can see I used our Butterfly punch and then used the different Daffodil Delight ribbons to "cover" the hole! Here are the products I used to make this card.


Stamp set: Flight of the Butterfly


Cardstock: Whisper White, Daffodil Delight


Ink: Daffodil Delight, Basic Black


Other: XL Butterfly punch, asst. Daffodil Delight ribbons, Stampin' Write markers in Basic Black & Daffodil Delight, stick on gems (not Stampin' Up!), sponge dauber, sponge


All products made by/sold by Stampin' Up! (except the stick on gems)

Monday, July 4, 2011

Pencil Over Ink technique

Do you have things/tools that you bought just knowing that you would use them alot and then find out that you don't use them as often as you thought because you just don't know "how" to use them? That's what happened with my colored pencils. I just HAD to have them but I rarely use them! I use my watercolor pencils all the time but not my regular colored pencils. So, needless to say I was happy when I came upon this technique! Basically, you stamp your image on dark cardstock using white pigment ink. Heat set the white pigment ink and then color over it with your colored pencils. Your image just seems to glow! Here are the items I used to make this card.


Stamp sets: Countryside, Teeny Tiny Wishes


Cardstock: Night of Navy, Riding Hood Red, Basic Black, Whisper White


Ink: Whisper White, Night of Navy


Other: colored pencils, heat tool, Cherry Cobbler Baker's Twine, Big Shot, Square Lattice embossing folder, Sizzlets Lots of Tags 1, Modern Label punch, Word Window punch, Stampin' Dimensionals


All products (except colored pencils) made by/sold by Stampin' Up!

Monday, June 27, 2011

Frost With A Twist technique

This is another really easy technique that gives a really neat effect. The technique is done on the "background" cardstock. All you do is brayer one color of dye ink onto glossy white cardstock. In this case I used Peach Parfait. Let the inked glossy white cardstock dry completely before continuing. Then, take a piece of wax paper and crumple it up really well. Flatten it out and use your brayer to brayer add ink to the wax paper. In this case I used Cajun Craze on the wax paper. Place the inked side of the wax paper over your cardstock and use to brayer to basically transfer the ink from the wax paper onto the cardstcok. Remove the wax paper and allow the cardstock to dry completely. You can stamp directly onto the cardstock or use it as a background as I did here! See? Told you it was easy. The hardest part is waiting for the cardstock to dry! Here is a list of the items I used to make this card.


Stamp set: Tiny Teacup


Cardstock: Cajun Craze, Peach Parfait, Whisper White, Glossy White


Ink: Peach Parfait, Cajun Craze


Other: brayer, wax paper, 1 1/4" Square punch, Scallop Square punch, gold brads, Peach Parfait 1/2" Stitched-Poly ribbon


All items made by/sold by Stampin' Up! (except for the wax paper of course!)

Saturday, June 18, 2011

Tinted Opaques technique

This was another fun and easy technique. All you need is dark cardstock, white pigment ink, markers to color your image, clear embossing powder, heat tool and a bold image stamp! Those are all pretty basic suppies that I'd bet most everyone has. You just stamp your image with the white pigment ink. Then, add the clear embossing powder and heat it. Then, use your markers to cover over the embossing powder. The color will bead on top of the embossing powder. Reheat with the color on top of the embossing powder. Color again (and again) until you get the color you like. The only thing is you have to color small areas and then heat set and then go back again with the same color if needed. After you get the color you want on that one area then move on to the next color. Heat set after each color. That's it! Takes a little time with all the "color, heat set, color, heat set...." but it's not too bad! Here are the products I used to make this card.


Stamp set: Inspired By Nature


Cardstock: Daffodil Delight, Always Artichoke, Basic Black


Ink: Whisper White


Other: clear embossing powder, heat tool, Ticket Corner punch, Dotted Scallop Border punch, 1/4" Daffodil Delight Grosgrain ribbon, stick on gems (not Stampin' Up!) and Stampin' Write markers in Always Artichoke, More Mustard & Chocolate Chip


All products (except stick on gems) made by/sold by Stampin' Up!

Saturday, June 11, 2011

Fossil Stone technique


My picture didn't come out good enough to really show you what this technique looks like. But, I like the card so I decided to show it to you anyway! The "splotched" lighter background piece is the piece with the technique. The basics of the technique are pretty simple. You need a plastic file folder or one of those sheet protector things. If you use the sheet protector you will want to trim two fo the edges so that you can open it up like a file folder. You will also need 2 coordinating colors of reinkers, 2 pieces of glossy white (or light colored) cardstock and a brayer. That's it! So, you open up the file folder/page protector and put a few drops of one of the inks on one side and a few drops of the other ink on the other side. Then close the file folder/page protector and "smush" them together. Air pockets in the "smushing" is good...it's even really good! Place your two pieces of glossy cardstock back to back with the glossy sides facing out. Open the file folder/page protector and place the cardstock on one side and close the file folder/page protector. Use your brayer to roll over the outside of the file folder/page protector. Keep rolling until you like the look of the ink on the cardstock. Open up the file folder/page protector and take out the cardstock. Set is aside to let it air dry. You now have enough to make TWO cards or other projects! Here are the items I used to make this card.


Stamp sets: Punch Potpourri, Teeny Tiny Wishes


Cardstock: Rich Razzleberry, Pacific Point, Whisper White, Glossy White


Ink: Rich Razzleberry, Pacific Point


Other: Big Shot, Elegant Lines embossing folder, Rich Razzleberry 1/8" Taffeta ribbon, glue dots, Stampin' Dimensionals, XL 2 Step Bird punch, Curly Label punch, page protector, brayer


All products made by/sold by Stampin' Up! (except the page protector)

Tuesday, June 7, 2011

Wood Grain Background technique

Yep...another really easy technique! Looks really cool no matter how easy it is though! You just use a toothbrush to drag the "wood" colors down your cardstock and then use a ruler to draw in the "boards". Can't be much easier than that! Here are the items I used to make this card.


Stamp sets: Countryside, Curvy Verses


Cardstock: Basic Gray, Whisper White, Chocolate Chip, Sahara Sand


Ink: Chocolate Chip, Basic Gray


Other: toothbrush, ruler, black marker, reinkers in Sahara Sand, Crumb Cake, Chocolate Chip, Cajun Craze & Basic Gray


All products made by/sold by Stampin' Up! (except toothbrush and ruler)


Friday, June 3, 2011

Metallic Background technique

Yep...another easy one! I think this technique would be really pretty using a darker green cardstock as the background and then use the metallic gold and/or silver and then use that for a Christmas card! Anyway, all you do is use the metallic reinkers and a pallete and sponge and dab the reinkers onto your dark colored cardstock. See? Told you it was easy. Again, the hardest part is waiting for the inks to dry so you can finish your project! A note on the embossing of the "Thank You": I used all three colors of embossing powder at once. I just stamped my image and then poured a little gold here and there, a little silver here and there and then some copper here and there. Then just shake off the excess and use your heat tool to emboss! Here is a list of the items I used to make this card.


Stamp set: Engraved Greetings


Cardstock: Shimmery White, Basic Black, Silver Metallic


Ink: VersaMark


Other: Encore reinkers in Gold, Silver and Copper, gold, silver and copper embossing powder, sponges, Ticket Corner punch, Basic Black Satin ribbon, Black Flourish Designer Jewels (from a previous mini catalog), Stampin' Dimensionals


All products made by/sold by Stampin' Up (even though some are now retired).

Thursday, June 2, 2011

Smooched Metal technique

I know I keep saying that most of these techniques are easy but...well...they are! This is another one that is really easy! All you do is take your Hodge Podge Hardware and paint it with the Smooch! The hardest part is waiting for the Smooch to dry so you can finish your project! While Stampin' Up! does sell some of the Smooch paints, they don't sell the color I used here. I've had these Smooch paints for quite a while and was happy to find this technique so I could use them! I need to get online and do and search for more things to do with the Smooch! Here is a list of the products I used to make this card.


Stamp sets: Love & Care, Tiny Tags


Cardstock/paper: Pretty In Pink, Basic Gray, Whisper White, Lap of Luxury DSP


Ink: Basic Gray


Other: Hodge Podge Hardware, Smooch Ink in Taffy, stick on gems, Ticket Corner punch, 1" Circle punch, Pretty In Pink 3/8" Taffeta ribbon, Stampin' Dimensionals


All products made by/sold by Stampin' Up! except the Smooch and stick on gems

Wednesday, May 18, 2011

Colored Reverse Grid technique

Yes...this technique is really simple! It reminds me of bathroom tiles! Or, maybe even kitchen backsplash type tiles! The raised part of the lines is on the back of your cardstock so the squares are raised like tiles with the "lines" being the grout! The only tools you need are either a Scor-It or your paper trimmer with a scoring blade! Other than that all you need is your cardstock, some ink and your stamps! Can't get much easier than that! According to the tutorial you can make your "tiles" 1 inch, 3/4 inch or 1/2 inch. You decide how big you want your tiles to be! Just line up your cardstock and start making your score lines at the intervals you decide to use. I used 1 inch. Then, turn your cardstock to make your score lines along the other side. Then, with your raised lines from scoring on the back side of your paper use a stamp pad to apply ink directly to your cardstock. Don't press down too hard. That's what will make your "grout lines" stand out more. Then, start stamping. Again though, don't press down too hard so that your stamped image doesn't show on your "grout lines". Then, it's just a matter of finishing your card or project! Here are the items I used to make my card.

Stamp sets: Priceless, Oval All

Cardstock: Whisper White, Daffodil Delight, Old Olive

Ink: Daffodil Delight, Old Olive, Night of Navy

Other: Scor-Pal (or other scoring tool), Night of Navy 1/4" Grosgrain ribbon, Scallop Oval punch, Wide Oval punch, Stampin' Dimensionals

All products made by/sold by Stampin' Up! (except Scor-Pal)

Monday, May 9, 2011

Bleached Coloring technique

Yes, again, SIMPLE! Basically, stamp your image with VersaMark or pigment ink, heat emboss, "paint" inside of image with bleach, use heat tool to dry cardstock, color in image with markers! See? Simple! Here is a list of the products I used to make this card.

Stamp sets: Crazy for Cupcakes, Teeny Tiny Wishes

Cardstock: Whisper White, Basic Black, Real Red, Basic Gray

Ink: VersaMark, Basic Black

Other: bleach, Q-Tip, black embossing powder, heat tool, Whisper White Satin ribbon, beads (these are Stampin' Up! but they are not available anymore), Stampin' Write markers, Stampin' Dimensionals, Word Window punch, Modern Label punch

All products (except bleach, Q-Tip) made by/sold by Stampin' Up!

Wednesday, May 4, 2011

Polished Stone technique

I'm not sure where I got this technique. I've had the tutorial for quite a while. But, yes, as usual, it is really simple and easy! You need reinkers and a metallic reinker, glossy cardstock, rubbing alcohol and some cotton balls! That's it! All you do is put a few drops of the metallic reinker on your cardstock. Then, soak your cotton ball in alcohol and then add a couple of drops of your other reinkers onto the cotton ball. Then, just start dabbing on your cardstock. You will end up picking up the metallic reinker onto your cotton ball of course. Allow the cardstock to dry and then spray on some acrylic sealer. You can then use StazOn ink to stamp on the cardstock or use it as a background as I did for this card. Here is a list of the products I used to make this card.

Stamp set: Butterfly Prints

Cardstock: Glossy White, Daffodil Delight, Marina Mist, Soft Suede

Ink: Marina Mist, Marina Mist reinker, Daffodil Delight reinker, Encore Gold metallic reinker

Other: rubbing alcohol, cotton balls, acrylic sealer, 1 1/4" Circle punch, Big Shot, Perfect Polka-Dots embossing folder, Flower Folds die, Two Tags die, Beautiful Wings Embosslit

All products (except cotton balls, alcohol, acrylic sealer) made by/sold by Stampin' Up!

Tuesday, May 3, 2011

Texture Plate Smoosh Technique

Yes...another really simply technique with really cool results! Basically, you pick out a texture plate, use your ink pads to apply ink directly to the texture plate, spray the texture plate with water, lay your piece of cardstock on the texture plate and run it through your Big Shot, let dry and use on your project! The hardest part is waiting for your cardstock to dry! (have you noticed that I'm not a very patient person? LOL) Here is a list of the items I used to make this card.

Stamp set: Cheep Talk

Cardstock: Whisper White, Rich Razzleberry, Pacific Point, Daffodil Delight

Ink: Rich Razzleberry, Pacific Point, Daffodil Delight

Other: spray bottle filled with water, Brights Glimmer brads, Rich Razzleberry 3/8" Taffeta ribbon, Small Oval punch, Large Oval punch, Daisies Texturz plate, Beautiful Wings Embosslit, Ticket Corner punch, Big Shot

All products made by/sold by Stampin' Up!

Monday, May 2, 2011

Embossed Vellum

OK....first things first! Some of you who are "ALL" Stampin' Up! might get a little peeved at me over this one! So, NO, the stamp of the dasies in the vase is NOT Stampin' Up! But, any time I see a stamp (or anything really) with daisies or daisy looking flowers on it I MUST have it! Daisies are my all time favorite flower! Anyone who really knows me knows that if they want to give me flowers for some unknown reason they should NOT buy roses...buy daisies if you want me to be happy! Anyway, when I started to do this technique this particular stamp just called out to me so I answered the call!

This technique is really simple. You just stamp your image (and, of course, you want an "open" image so you can color it) using white pigment ink. Then, apply white or clear embossing powder and heat. Flip your image over and use a stylus and mousepad to trace over the embossed lines to give it a dry embossed look on the front. Then color in the image. The embossing is the "front" and the coloring is the "back". Allow the coloring to dry and then flip it back over and attach to your project! EASY! Here is a list of the products I used to make this card.

Stamp set: Just Believe, other stamp that is NOT Stampin' Up!

Cardstock: Pear Pizzazz, Peach Parfait, Crushed Concord

Ink: Whisper White Craft, Concord Crush

Other: eyelets, vellum, stylus, mousepad, heat tool, white embossing powder, Stampin' Write markers in Concord Crush, Daffodil Delight, Peach Parfait, Pear Pizzazz

All products (except daisy stamp and mousepad) made by/sold by Stampin' Up!

Friday, April 29, 2011

Jenny's Coat technique

The technique for this card is called Jenny's Coat. I got this technique from the Technique Junkies newsletter. It was suggested to them by Cathy Yamashita. It's really quite simple! Use DSP (patterned paper) and stamp your image on it using VersaMark. Emboss using clear embossing powder. Use a brayer to apply black ink over your embossed image. Wipe off any ink on your embossed image using a soft cloth or paper towel. That's it! Your patterned paper shows through your embossed image! Can't get much easier than that! Here is a list of the items I used to make this card.

Stamp set: Upsy Daisy

Cardstock/paper: Basic Black, Real Red, Love Impressions DSP, Red Glitter paper

Ink: VersaMark, Basic Black

Other: clear embossing powder, heat too, Stampin' Dimensionals, Small Heart punch

All products made by/sold by Stampin' Up!

Wednesday, April 27, 2011

Textured Toothpaste technique

This was another fun one using an every day household item! TOOTHPASTE! Everybody has toothpaste at home (well...unless everybody in the house has dentures I guess LOL). This technique came from the Technique Junkies Newsletter. It's pretty simple. You get one of those little painter palettes and squirt some toothpaste in the little cups. You squirt as many times as different colors you plan on using. So, for this card I had three different "squirts" of toothpaste. And, on a side note, the tutorial said it didn't matter if you used gel toothpaste or paste toothpaste. Anyway, then you add reinker to the different squirts of toothpaste and use a toothpick or spoon or whatever to stir up each squirt to mix the reinker and toothpaste. Then, you place a brass stencil over your cardstock and use a paintbrush to paint the toothpaste into the open areas of the stencil. Then, remove your stencil and cover your colored toothpaste with Ultra Thick Embossing Powder. Heat it and you are done! Here are the items I used to make this card.

Stamp set: Live, Laugh, Love

Cardstock/paper: Very Vanilla, Baja Breeze, Rose Red, Springtime Vintage DSP

Ink: Rose Red, Baja Breeze

Other: toothpaste, paint palette, reinkers in Rose Red, Baja Breeze and Pear Pizzazz, ultra thick embossing powder, paint brushes, heat tool, toothpicks, Antiques brad, metal stencil

All products made by/sold by Stampin' Up! except the toothpaste, paint palette, ultra thick embossing powder, paint brushes, toothpicks and metal stencil

Friday, April 22, 2011

Texture Duet technique

I know I say this about alot of these techniques but, really, this was SO easy! Seriously easy! I have tried some techniques that were more difficult and, quite honestly, they came out NOTHING like the picture in the technique tutorial showed. Maybe it's that I say all of the ones I've posted are easy because they easy ones are the only ones I can manage! (grin) This one is really basic! What you are going for is one texture at the top, a different texture at the bottom and a "non-textured" area in the middle. All you do is put your cardstock in your embossing folder but only have part of the cardstock actually "in" the folder. Run it through your Big Shot. Then, turn the paper around and run the other end through your Big Shot using a different embossing folder. Then, use whatever scoring tool you normally use to put a "line" at the top and bottom of the untextured (is that even a word? untextured?) section. Then, using the scoring tool, you "frame" the whole piece of cardstock. I'm not sure you can really see that part in the picture above. But, there is a scored line about 1/8" in from the edge of my cardstock all around the edges. If you have any questions please either leave a comment here or email me. This technique came from the October/November Technique Junkies newsletter. The "original" idea came from Lee Conroy. Here are the items I used to make this card.

Stamp set: Tiny Tags

Cardstock: Very Vanilla, Wild Wasabi, So Saffron, Perfect Plum

Ink: Wild Wasabi

Other: Big Shot, Finial Press embossing folder, Perfect Polka Dots embossing folder, ScorPal, Victoria Crochet Trim, 3/4"X16/16" Oval punch, Small Oval punch, Large Oval punch, Scallop Oval punch, Stampin' Dimensionals

All products (except ScorPal) made by/sold by Stampin' Up!

Monday, April 18, 2011

Ice Crystals technique


This was one of those "OH...cool" things for me! I was not expecting my cardstock to look so cool after it dried! I'm not sure what I was expecting but it wasn't this! It reminds me of a thick layer of ice on a window. The first picture is of my finished card. The second picture is of the plain cardstock after it dried. See the sort of glazed look of it. I used the Concord Crush piece of cardstock for a different card. This is one of my new favorite techniques now! And, again, it's really quite simple. Basically, you need a bowl, 1 cup of boiling water, 1 cup of Epsom salt and a paintbrush! EASY! Most folks have Epsom salt but if you don't it's quite easy to find at your local drug store and it's not expensive! For me, that is a BIG plus! You pour the boiling water into a bowl and then add the Epsom salt. Stir until the Epsom salt is all dissolved and then "paint" it onto your cardstock. Then, let it dry! You can also use white or cream colored cardstock and add some reinker to the Epsom salt/water mixture for a more subdued color. The hardest part about this technique is waiting for the cardstock to dry! You won't see the effect at first but as it dries you start to see the frosty effect of the drying Epsom salt. Here is a list of the items I used to make this card.

Stamp set: Cute by the Inch

Cardstock/paper: Peach Parfait, Poppy Parade, Whisper White, Sunny Garden DSP

Ink: Poppy Parade

Other: Poppy Parade 1/2" Stitched Poly ribbon, Stampin' Dimensionals, other items mentioned in paragraph above.

All products made by/sold by Stampin' Up! (except the water and Epsom salt and such!)


Sunday, April 17, 2011

Background Pop technique

Yet another really easy technique! You just stamp your background on two pieces of cardstock. Then, on one of them stamp your "image" stamp (the little flower in this case). Then, cut it out and place it on the main background piece of cardstock right over where the background stamp lines up. EASY! Here are the products I used to make this card.

Stamp sets: Pretty Petals background stamp, Simple Friendship

Cardstock: Whisper White, Tempting Turquoise

Ink: Tempting Turquoise, Rich Razzleberry

Other: Stampin' Dimensionals, Rich Razzleberry 1/4" Grosgrain ribbon

All products made by/sold by Stampin' Up!

Thursday, April 14, 2011

Glitter Window technique

I don't use glitter very often. I end with the stuff EVERYWHERE! After making this card I saw a piece of glitter on the bathroom floor!!!! I swear, I get the stuff everywhere and it's harder than poo to get cleaned up! At least it is for me! I know it's hard to tell from the picture but there is glitter all over the punched out part where the text is! This technique is fairly simple (except for getting glitter everywhere!). First I cut the strip of Daffodil Delight and stamped the little cupcakes all over it. Then, I punched the shape out. Then, I laid the Daffodil Delight strip over the Whisper White strip and stamped the text where it would show through the window. Then, I flipped the Daffodil Delight piece over and placed a piece of clear packing tape on the back of it. Then, I flipped it back over so that the stamped side was up. Then, I just dumped the glitter over the tape showing through the "window". Rub the glitter in (hence, glitter ALL over my hand which then ended up on my face and everywhere else). Dump off the excess glitter. Then, I lined up my piece of Whisper White so that the stamped text showed through and glued it in place. Then, it's a simple matter of finishing off the card! EASY but MESSY (at least for me!) Here are the items I used to make this card.

Stamp sets: Itty Bitty Bits, Full of Life

Cardstock/paper: Daffodil Delight, Whisper White, Melon Mambo, Pumpkin Pie, Crumb Cake, Sweet Stitches DSP

Ink: Daffodil Delight, Chocolate Chip

Other: clear packing tape, Dazzling Diamonds glitter, XL Decorative Label punch, XL Build-A-Cupcake punch, Sweet Stitches Designer buttons, Whisper White 1/8" Taffeta ribbon, glue dots

All products (except packing tape) made by/sold by Stampin' Up!

Wednesday, April 13, 2011

Shimmering Success technique


The technique used on the background of this card is called Shimmering Success. The instructions for the original technique called for Lumiere. I don't have any Lumiere anymore and Stampin' Up! doesn't sell it anymore. So, instead, I used the Frost White Shimmer Paint that Stampin' Up! does currently sell. The second picture above just shows you a close-up of the technique. So, anyway, the technique itself is really easy. You start with Glossy White cardstock and brayer on your color of choice. Then, using plastic wrap or a sponge you just dab on the Shimmer Paint. Let the Shimmer Paint dry completely. Then, stamp on an image or leave as is and use without a stamped image. If you do stamp on an image use StazOn. If it's an open image you can then color in the image using an AquaPainter and ink or water color crayons! Easy! The hardest part of me is waiting for the Shimmer Paint to dry! I am NOT a patient person! (grin) Here is a list of the items I used to make this card.

Stamp set: Easter Blossoms

Cardstock: Certainly Celery, Pink Pirouette, Marina Mist, Whisper White, Glossy White

Ink: Certainly Celery, Soft Suede, Timber Brown StazOn

Other: brayer, Frost White Shimmer Paint, plastic wrap, Whisper White 3/8" Taffeta ribbon, Stampin' Dimensionals


All products (except plastic wrap of course) made by/sold by Stampin' Up!

Sunday, April 10, 2011

Rainbow Embossing technique

I am such a simpleton! LOL I LOVE heat embossing! I could sit and heat emboss and watch that embossing powder melt all day long! LOL And, yes, as you might have suspected from that comment...doesn't take much to keep me entertained! LOL Anyway, this technique is called Rainbow Embossing and it's as simple as using at least two different colors of embossing powder on one image! You just stamp with your VersaMark, add the first color of embossing powder, shake of the extra CAREFULLY and then add the next color. I used just two colors on the image here. I used Stampin' Up! Iridescent Ice in the center and then one of Ranger's embossing powders called Pearl Blue on the outer part of the medallion. Here is a list of the items I used to make this card.

Stamp sets: Medallion, Thoughts & Prayers

Cardstock: Very Vamilla, Night of Navy

Ink: VersaMark, Very Vanilla, Night of Navy

Other: embossing powders (Iridescent Ice by Stampin' Up! and Pearl Blue by Ranger), heat tool, sponge, Wide Oval punch, Scallop Oval punch, Vintage Flower Adornments, Very Vanilla 3/8" Taffeta ribbon, Stampin' Dimensionals, glue dots

All products made by/sold by Stampin' Up! (except for Ranger embossing powder)

Thursday, April 7, 2011

Faux Metal

I made the three "medallions" across the center of this card using the Faux Metal technique. Again, this is another technique that is SO simple but looks just stunning! First, you ink your stamp with VersaMark but then just set it aside. I think the VersaMark must help keep the melted embossing powder from sticking to your stamp. Then, you cover your cardstock with VersaMark. Either use a brayer or you can just use the "direct to paper" method. Then, cover your cardstock with embossing powder and melt it. While it's still hot add more embossing powder on top of what you just melted. Heat it again until that embossing powder melts. Keep adding embossing powder while it's still hot and melting for at least 4 more times. You want a nice thick layer of melted embossing powder on your cardstock. After you have a thick enough layer while the melted embossing powder is still hot press your stamp down into the melted embossing powder. Hold your stamp there for just a second to be sure you get a nice image. Then, let the embossing powder cool and cut out your image and use as desired. EASY but a really cool effect! Here are the items I used to make this card.

Stamp set: Cute By The Inch

Cardstock/paper: Note Quite Navy, Baja Breeze, Springtime Vintage DSP

Ink: VersaMark

Other: heat tool, silver embossing powder, Whisper White Organza ribbon, Vintage Flowers Adornments, Scallop Square punch, glue dots, Stampin' Dimensionals

All products made by/sold by Stampin' Up!

Saturday, April 2, 2011

Frost Background technique


The technique used on the background on this card is called Frost Background. It's really simple to do. All you need is some wax paper, some dye inks, a brayer and some glossy cardstock. I just LOVE anything "faux" and anything using simple items around the house for something other than what they are intended to be used for! So, all you do is take a piece of wax paper and crumple it up really good. Then, flatten out the wax paper and use your brayer to cover it with ink. Then, flip the wax paper over onto your glossy cardstock and use the brayer again to roll the inked side of your wax paper onto your glossy cardstock. Then, remove the wax paper from the cardstock and let it dry! Easy, peasy! Here are the items I used to make this card.

Stamp set: All Holidays

Cardstock: Tempting Turquoise, Whisper White, Glossy White

Ink: Tempting Turquoise

Other: wax paper, brayer, silver brads, Stampin' Dimensionals, Ticket Corner punch

All products made by/sold by Stampin' Up!

Thursday, March 31, 2011

Herringbone technique

I'm not usually very good at piecing paper together like this but I really like how this turned out. No matter how hard I try I usually end up with small gaps between some of the pieces of paper! This technique is a GREAT way to use up scrap pieces of cardstock and DSP! You start with a scrap piece of cardstock of whatever color and cover it with adhesive. I used my Xyron but you could also use double sided tape. Just be sure to cover the entire piece of cardstock. Then, start with the one strip that goes diagonal (for this card it is the long piece of Old Olive that goes from the upper left to the lower right). Then I placed the two smaller pieces of Old Olive, one going from the center to the upper right and the other going from the center to the lower left. Then, go to which ever section you want and lay the pieces out. After you finish that section go on to the next one. I know I so suck at giving directions on stuff like this so if you want more detailed instructions just email me. I think most of you will probably be able to figure it out though. But, if you are in the least like me and want some more details just write me! I got this technique from the Technique Junkies Newsletter. Here are the items I used to make this card.

Stamp set: Perfect Punches

Cardstock/paper: Melon Mambo, Old Olive, Ice Cream Parlor DSP

Ink: Melon Mambo

Other: doubled sided tape, XL Decorative Label punch, Wide Oval punch, Ice Cream Parlor ribbon, Ice Cream Parlor Flower button, Stampin' Dimensionals

All products made by/sold by Stampin' Up!

Wednesday, March 30, 2011

Kissing technique

I used the Kissing technique on the petals of the flower. Basically you ink up your stamp (a solid stamp) and then you ink up a second stamp with a coordinating color and stamp your first stamp onto the second stamp then stamp onto your cardstock. So, for this card I used one of the petals from the Build A Blossom set and inked it with Daffodil Delight. I inked up the Sanded Background stamp with Peach Parfait. Then, I pressed my petal stamp onto the Sanded Background stamp. That transferred the Peach Parfait ink on the Sanded Background stamp onto the petal. It's hard to see in the picture above but it gave my petals a really nice textured look. Here are the products I used to make this card.


Stamp sets: Teeny Tiny Wishes, Build A Blossom, Sanded Background

Cardstock/paper: Whisper White, Old Olive, Peach Parfait, Chocolate Chip, Ice Cream Parlor DSP

Ink: Old Olive, Peach Parfait, Daffodil Delight

Other: sticker sheet from the Ice Cream Parlor DSP pack, 1" Circle punch, XL Blossom Petals punch, Word Window punch, Modern Label punch, Square Lattice Embossing folder, Stampin' Dimensionals, Sweet Stitches Designer buttons, Chocolate Chip 1/8" Taffeta ribbon


All products made by/sold by Stampin' Up!

Tuesday, March 29, 2011

Stained Glass technique


You really can't tell much from this picture unfortunately. But, the image of the cakes is what I did this technique on. Basically, you stamp your image on vellum using VersaMark or a pigment ink. Then, use embossing powder and heat emboss it. Then, you color in your image on the back side using markers. The "front side" will be the side with the raised embossed image on it. By coloring on the back side it sort of mutes the colors. Here is a list of the products I used to make this card.

Stamp set: Birthday Bakery


Cardstock/paper: Daffodil Delight, Pacific Point, Whisper White, vellum, Ice Cream Parlor DSP (from the SAB catalog)


Ink: VersaMark, Pacific Point


Other: black embossing powder, heat tool, silver eyelets, Stampin' Dimensionals, glue dots, asst. Stampin' Write markers, Ice Cream Parlor ribbon (from the SAB catalog), Ice Cream Parlor buttons (from the SAB catalog)


All products made by/sold by Stampin' Up!

Saturday, March 26, 2011

Emboss Resist technique

Emboss Resist is a "old" favorite for many of us. I just love heat embossing anyway! There is just something about watching that embossing powder melt! (grin) Anyway, emboss resist is really easy! You take your light colored cardstock, stamp on your image using VersaMark, add clear embossing powder, heat it (my favorite part!). Then, there are any number of ways you can add color...brayer, sponges, direct...you get the idea! I used sponges on this card. Then, after you add your ink take a paper towel or tissue and rub over the embossed part to remove any ink from the top of the melted clear embossing powder. That's it! Told you it was easy! Now, here are the products I used to make this card.

Stamp sets: Sincere Salutations, Elements of Style

Cardstock/paper: Rose Red, Very Vanilla, Pear Pizzazz, Springtime Vintage DSP

Ink: Pear Pizzazz, Crumb Cake, Baja Breeze, Rose Red, VersaMark

Other: Big Shot, Lots of Tags Label 3 Sizzlet, sponges, Pear Pizzazz Seam Binding, Stampin' Dimensionals, glue dots, stick on pearls, XL Decorative Label punch, clear embossing powder, heat tool

All products made by/sold by Stampin' Up! except for the stick on pearls.

Monday, March 21, 2011

Bleached Out Images technique

I just love using regular, every day household items in my cardmaking! It's like finding a new and fun use for something that typically not so fun to use. I mean really...just how many of us ENJOY doing laundry!?!?! But, now I can go into my laundry room and get some bleach and do something fun with it! (grin) Anyway, this technique is really pretty simple. You stamp your image using VersaMark. Then, I used clear embossing powder so that the dark red of the Cherry Cobbler cardstock would show through the embossing powder. The only "trick" to this technique is getting the bleach on evenly. You can see that I didn't do such a good job of that on my card! I used multiple "layers" of bleach letting the bleach dry between each application in an effort to get the bleaching even. I assume you could just keep going until your cardstock was bleached to your liking. Then, you let it air dry or use your heat tool to dry the bleach. I then cut out the rose and finished my card! Quite easy really! Here is a list of the products I used to make this card.

Stamp sets: Fifth Avenue Floral, Silhouette Sentiments

Cardstock/paper: Very Vanilla, Cherry Cobbler, Botanical Gazette DSP

Ink: VersaMark, Cherry Cobbler

Other: bleach, water color brush, stick-on gems, Stampin' Dimensionals, clear embossing powder, heat tool, 3/4" X 15/16" Oval punch, Scallop Oval punch, Scallop Trim Border punch, Dotted Scallop Ribbon Border punch, Ticket Corner punch, sponge

All products (except stick-on gems, bleach & water color brush) made by/sold by Stampin' Up!

Friday, March 18, 2011

Chalked Pigment technique

The technique used on the lower part of the front of this card is called Chalked Pigment. Now, by me using the green cardstock (Always Artichoke) it also looks like a technique called "chalkboard something". I can't remember the exact name of that technique but you see that by using the chalk on a dark color of cardstock it does looking something like a chalkboard. This is really a simple technique. You stamp with a pigment ink (Whisper White in this case) and then rub the chalk over the stamped image. And, just a little FYI on the sentiment part of the card - I used to Sizzlet twice. First I used the Rose Red cardstock and then the Very Vanilla. I cut the center part out of the Rose Red die cut to make a "frame" and then placed the Rose Red die cut over the Very Vanilla die cut. Here is a list of the items I used to make this card.

Stamp sets: Itty Bitty Bits, Elements of Style

Cardstock/paper: Crumb Cake, Rose Red, Very Vanilla, Always Artichoke, Springtime Vintage DSP

Ink: Always Artichoke, Whisper White

Other: Stampin' Pastels, Neutrals brads, Q-Tip, Chantilly 1/2" Crochet Trim, Stampin' Dimensionals, Big Shot, Lots of Tags 2 Sizzlet

All products made by/sold by Stampin' Up! (except for the Q-Tip of course! LOL)

Wednesday, March 16, 2011

Brayer/Rubber Band background technique

I think this background looks fun (almost like party streamers) and is SO easy! You take your rubber brayer roller, wrap some different sized rubber bands around it, roll on ink pad or pads of your choice and roll on your paper! Can it get any easier than that? PERFECT for a birthday card! You can use one color of ink or multiple colors of ink. Here are the products I used to make this card.

Stamp set: Matchbox Messages

Cardstock: Whisper White, Daffodil Delight, Pacific Point

Ink: Melon Mambo, Pacific Point, Daffodil Delight, Peach Parfait

Other: brayer, rubber bands, 1 1/4" Circle punch, sticker sheet from Ice Cream Parlor DSP (from SAB), Stampin' Dimensionals

All products (except the rubber bands of course) made by/sold by Stampin' Up!

Saturday, March 12, 2011

Block Collage technique

The technique for this card is called Block Collage. It's really quite simple! You get multiple stamps with a common theme first. You will also need two ink colors in the same color family, one light and one darker. You brayer the lighter ink over your cardstock sparingly. Then, stamp your focal image in the center of your cardstock. You also stamp the image on a Post-It note. Cut the image on the Post-It note out and cover the image on your cardstock. Use the other stamps you picked out all along your cardstock using your darker ink color. Then, use a stipple brush and "stipple" along the edges of the Post-It note with the darker ink color. This will sort of "highlight" your focal image. Then, remove the Post-It note and mat or embellish as desired! See? EASY! Here are the items I used to make this card.

Stamp set: Friends Never Fade

Cardstock: Very Vanilla, Regal Rose, Rose Red

Ink: Regal Rose, Rose Red

Other: stipple brush, Post-It note, Pinking Hearts Corner punch

All products made by/sold by Stampin' Up!


Friday, March 11, 2011

Triple Mosaic technique

The technique for the background of this card is called Triple Mosaic. I got the instructions for it from the June 2006 Technique Junkies newsletter. The idea came from Julia Muscari. When you follow the technique instructions you actually end up with enough to make three cards in one! You need a large background type stamp, three colors of cardstock, repositional adhesive, stamp positioner (like a Stamp-a-ma-jig) and your paper trimmer! You use your stamp positioner to stamp on each piece of cardstock. Then, use the repositional adhesive to stack the cardstock one on top of the other. Then, use your paper trimmer to cut the cardstock at all different angles. So, you end up with three pieces cut exactly the same only in different colors. Then, you can lay the pieces out almost like a puzzle. So, see the yellow piece in the bottom right on my card? I also had two other pieces in the exact shape only in the orange and blue. Once you get them all laid out you can start gluing them down to your background piece of cardstock. You can either use them just as is and glue them down. Or, you can ink the edges of each piece just to sort shadow the edges. Or, you can leave even spaces around each piece to give a grout line type effect. I glued mine down as they were but then decided to use some ribbon as a "grout line". Here is a list of the different products I used to make this card.

Stamp sets: Pretty Petals (background stamp), Full of Life

Cardstock: Very Vanilla, Poppy Parade, So Saffron, Baja Breeze

Ink: Early Espresso

Other: Early Espresso 1/8" Taffeta ribbon, glue dots (to stick down the ribbon), Stampin' Dimensionals, In-Color Glimmer brads

All products made by/sold by Stampin' Up!

Sunday, March 6, 2011

Dragged Madras technique


The technique used for the background is called Dragged Madras. It's quite simple really but makes a nice plaid looking background. I didn't follow the directions exactly. I was supposed to make the dragged lines at "exact" measurements. I liked the random look better so that's what I did! (grin) Basically you use a cosmetic sponge, add some reinker of your choice and drag the sponge along the edge of a scrap piece of cardstock with a straight edge. Then, move the cardstock and drag again. Easy Peasy! You do that all long your background piece of cardstock. Then, turn the cardstock 90 degrees and use a different but complimentary ink to make the lines in the other direction. Here are the products I used to make this card.

Stamp Set: Trendy Trees

Cardstock: Whisper White, Wild Wasabi

Ink: Wild Wasabi, Garden Green, Chocolate Chip

Other: sponge, piercing tool, Stampin' Dimensionals

All products made by/sold by Stampin' Up!

Friday, March 4, 2011

Antique Wallpaper technique

This one was rather interesting! I LOVE new background techniques! Now, the tutorial called for distress inks. I do have some of those but I wanted to also try some of our Classic inks to see the difference. The blue and green cardstock above was made using our Classic inks. The red and brown was made using some of the Tim Holtz/Ranger Distress inks. I do like them both but I sort of like the one using our Classic inks better! Who knew? (grin) The basic instructions are to first run your cardstock through you Big Shot using an embossing folder. You then rub the inks directly from the ink pad onto the raised parts of the cardstock. Then, spritz with water and lift the cardstock and watch the inks run! Use your heat tool to dry the cardstock. Then, after the cardstock is dry run it through your Big Shot again but this time when you make your "sandwich" don't put the cardstock "in" the embossing folder. Put it on top of the embossing folder. Basically, what you are doing it flattening out the embossed part of the cardstock. Then, apply an antique color of ink to the edges of your cardstock to enhance the aged look. This tutorial came from the June/July 2010 Technique Junkies newsletter. If you want more detailed instructions on this technique please email me or leave a comment. Here are the inks I used to make these two samples.

Stampin' Up! Classic Inks in Not Quite Navy, Crumb Cake and "edged" with Chocolate Chip

distress inks in Fired Brick, Tea Dye and "edged" in Vintage Photo

I used the Vintage Wallpaper embossing folder.

All products made by/sold by Stampin' Up! except for the distress inks.

Wednesday, March 2, 2011

Faux Dry Embossing Technique

When I first did this card I didn't really think it looked like dry embossing. But, I'll be danged, the more I look at it the more it DOES look like dry embossing! I think some call this technique "ghosting" or something like that. But, the technique directions that I followed (from the April 2006 Subscribers Only Pages of the Technique Junkies newsletter) call this Faux Dry Embossing. Of course it's as simple as it looks really. You stamp your image using Whisper White Craft ink. Let it dry and then use your Stamp-a-ma-jig to stamp a bit "off" using a darker ink color. Here are the items I used to make this card.

Stamp set: Always

Cardstock/paper: Crumb Cake, Marina Mist, So Saffron, Whisper White, Botanical Gazette DSP

Ink: Marina Mist, Whisper White

Other: Stamp-a-ma-jig, Big Shot, Top Note die, Flower Daisies #2 die, Scallop Border punch, Antiques brads

All products made by/sold by Stampin' Up!

Sunday, February 27, 2011

Bleach Overstamping Technique

This technique is from the June/July 2004 Technique Junkies newsletter. It's really pretty cool! I love using "household" items in my stamping! This technique is really quite simple. You use just regular liquid bleach and pour it into a container that has paper towels in it to pretty much make yourself a bleach stamp pad. Then, "ink" your stamp with the bleach and stamp it on your cardstock. You will, however, want to immediately clean your stamp after stamping to get all the bleach off! Let the bleach dry or use a heat tool to dry the bleach on your cardstock and then stamp again with "real" ink. That's pretty much it! Here are the items I used to make this card.

Stamp sets: Upsy Daisy, Medallion

Cardstock: Very Vanilla, Pretty In Pink, Early Espresso, Rich Razzleberry

Ink: Early Espresso, Pretty In Pink

Other: bleach, 5/16" Jumbo brads, Early Espresso 3/8" Taffeta ribbon, Stampin' Dimensionals

All products (except bleach of course) made by/sold by Stampin' Up!

Wednesday, February 23, 2011

Burnished Embossing technique

I am sure you can't tell from the picture but this technique really is pretty cool looking "in person". Basically you use a medium to dark color of cardstock, emboss your image on it in black and then use the same color ink as the cardstock and a sponge dauber all around the embossed image. The ink will make the cardstock just a bit darker all around the embossed image. It almost looks like a shadow around the embossed image. Here are the items I used to make this card.

Stamp sets: Baroque Motifs, Sincere Salutations

Cardstock: Very Vanilla, Crumb Cake, Chocolate Chip

Ink: VersaMark, Chocolate Chip

Other: heat tool, black embossing powder, sponge dauber, Very Vanilla 5/8" Grosgrain ribbon, Stampin' Dimensionals

All products made by/sold by Stampin' Up!

Sunday, February 20, 2011

Pulled Reinkers

There are a few different things I want to cover with this post! First, you can see from the picture what I "do" with all these techniques. My memory SO sucks that I'd either forget how to do a technique or completely forget that I know how to do it! So, I make these cards. I'll use this picture to explain the size of each card. In this picture the orange cardstock is 6 inches by 6 inches. It's Pumpkin Pie. The next layer is the blue and it's 5 3/4 inches by 5 3/4 inches and is Not Quite Navy. Usually I make the white part with the instructions 5 inches by 5 inches and then attach punched out pieces of the "sample" of what the finished technique looks like around the 5 by 5 piece. Instead of doing that I cut the "sample" to be part of the background behind the instructions. I store all of these cards in one of Stampin' Up's! 6 by 6 scrapbook albums. I've got so many technique cards now that I need to get some sort of bin to store them all in! You can probably read the card well enough to see how to do the technique. I did use three different colors of reinker even though you can't really see one of them. I used Pumpkin Pie, Not Quite Navy and Old Olive. It's the Old Olive that you can't see that well.

Now, for my second "thing" to cover with this post. How do you like my new background? Michelle Laycock did all the graphics for my blog a while back. I get updates from her blog pretty much daily. She came up with a new type of background. If you will scroll some you will see that my plaid background "moves" but the paw prints over on the right don't! When she sent out a post from her blog about her new type of background I HAD to have one! I did like the stripes I had as my background before but you wouldn't be able to tell that it was scrolling but the paw prints weren't! So, that's why I had her make the plaid background. I did like the stripes better though! LOL Michelle does some GREAT graphics. If you are interested in maybe having her make some graphics for your blog check out her site. There is a banner for her site in the sidebar over on the right.

Thursday, February 17, 2011

VersaMark Stencil Technique

This one was SO simple, but, at the same time not so simple. The basics are that you use a stencil (the one I used is one of our Definitely Decorative stencils), lay it over your cardstock and then use either a VersaMark pad to "pounce" over the stencil or use one of the markers that VersaMark makes. The "tricky" part is making sure you keep the stencil EXACTLY still! This stencil was really tricky since it's made of that thin plastic. I think metal stencils might be a bit easier. You know how "sticky" the VersaMark can be? Well, the stencil tends to "stick" to the VersaMark pad so you have to hold the stencil down REALLY well or it ends up moving! I did the embossing on the top first and then just moved the stencil down and turned it around to do the "swirl" on the bottom. I also used two different colors of embossing powder. First I added the green embossing powder towards the middle of the image, then I removed the extra, then I added the gold embossing powder, removed the extra and then used the heat tool to melt the embossing powder. If you have any questions about the technique please email me. I'm more than happy to answer any questions that I can! I got this technique from the Technique Junkies newsletter. If you are "into" techniques that's the newsletter to subscribe to! Here is a list of the items I used to make this card.

Stamp set: Perfect Punches

Cardstock: Basic Black, Very Vanilla

Ink: Basic Black, VersaMark

Other: Vintage Ornaments Decor Stencil, embossing powder, heat tool, stick-on gems, Wide Oval punch, XL Decorative Label punch, Ticket Corner punch, Stampin' Dimensionals

All products made by/sold by Stampin' Up! (except for the stick-on gems)

Wednesday, February 16, 2011

Acetate Sparkle technique

Sorry it's been so long since I posted! There just aren't enough hours in the day to get everything done that I have to get done! The lady that founded the dog rescue that my husband and I volunteer with passed away back in October. Alot of the paperwork of running the rescue has fallen on me! MAN...I never realized just how much paperwork Judy had to do! It's a constant battle to keep everything running smoothly!

Anyway, here is a technique for you to try. I will warn you though, DO NOT do this if you need a card NOW! You have to give about 24 hours for the glitter glue to dry before you attach it to your card or project! It's a fairly simple technique really. You stamp your image on the acetate. Let the ink dry. OH...you need to use ink like StazOn too! Anyway, you let the ink dry and then fill in the image with glitter glue (I used Stickles). Then, let the Stickles dry for 24 hours so that it won't "smush" when you attach it to your card or project. Here is a list of the items I used to make this card.

Stamp sets: Crazy for Cupcakes, Sincere Salutations

Cardstock/paper: Blushing Bride, Whisper White, Blushing Bride Patterns DSP

Ink: StazOn Jet Black, Blushing Bride

Other: acetate, Stickles in various colors, stick-on gems, Stampin' Dimensionals, silver eyelets, Blushing Bride Striped Poly ribbon

All products made by/sold by Stampin' Up! except for the Stickles and stick-on gems.

Wednesday, February 9, 2011

Another Swap Card


There are two shots of the GREAT card by Cathy Bell. Of course, the first shows the outside of the card and the second shows the inside. Cathy always makes THE neatest and prettiest cards! If you are interested in the products she used to make this card please email me or leave a comment and I'll let you know.

Monday, January 31, 2011

Card I Made for the December Swap

This is the card I made for the December Monthly Card Swap. Obviously the "theme" was Valentine's Day! Here is a list of the items I used to make this card.

Stamp sets: Paisley Prints, Grateful Greetings

Cardstock: Blushing Bride, Real Red, Whisper White

Ink: Real Red, Blushing Bride

Other: Brights brads, Ticket Corner punch, Full Heart XL punch, Heart to Heart XL punch (I put one of the hearts from this punch on the inside of the card), Blushing Bride Stitched Poly ribbon

All products made by/sold by Stampin' Up!

Sunday, January 30, 2011

It's been awhile...


I know...it's been awhile since I've posted! There just aren't enough hours in the day to do what I must do and what I want to do! And, I know I said before that I was going to be concentrating on showing you all some techniques. Well, I haven't had as much time as I'd like to even try new techniques! So, instead, for the next few days I'll be showing you the last of the swap cards I got. I didn't sign up for the 2011 Monthly Card Swap just because of my limited time. So, this is one of the cards I got for the December 2010 swap. This one was made by Cathy Bell (Cathy makes some GREAT cards!). The second picture shows you the inside of the card just so you could see how she arranged the little button embosslits to show through the heart cut out on the front!